This is probably the easiest job you searched to learn about on Google.
Frankly speaking, carpentry and fixing pieces of furniture isn’t some sort of child’s play; but if done the right way, you can actually set up the whole closet in your room without needing to summon professional help.
Works involving carpentry, as we already mentioned above, is in actual aspect a very serious task. Lots of things are connected here in a complicated manner; and if you manage to screw up (figuratively speaking) one tiny thing, it won’t take a second for your whole effort after that particular piece to go in vain.
It’s a crucial task and a work of art, so treat it like one if you don’t want to face disastrous aftermath.
Read Next: How to Hang Floating Shelves without Brackets
Make an Organized Plan
1. Do we have to?
Yes, this is the mandatory rule for executing every single task out there. Plan it out first. Now, the closet systems is a very wide concept, it’s not limited to a specific outlook or structure. The structure and style depend on its location, purpose and user’s preferences. So, you have to take your decisions based on those particular things first.
2. What options do we have?
Usually, people go for one of the two structures laid out there for closet construction. It’s either wall-to-wall; or in fewer cases, with an open end on one side. Choose whatever you think will be the best for the moment, or the one you like the most.
3. Which one is the best option?
Both are best in their own ways; but you have to remember, both types have their own set of pros and cons. Shelves with an open-end give you more space to hang and store your things and enable the direct access from the side which is not possible with wall-to-wall shelves.
On the other hand, wall-to-wall shelves make the best use of the space it’s been given. And the support is more stable compared to the ones with an open-end. So, choose wisely. And if you have drawers in mind, take a decision keeping that part in mind too.
4. How are we supposed to do the planning?
You have to sort out the size, the type of material you want to use, the adjustment that will be required for a certain outlook beforehand. Because what tools, materials will be needed here depends on this particular planning.
Gather Tools and Materials
After you’re done with thinking and making plans about the shelves you want to see in your closet, it’s time to gather all the necessary things to start on the process.
Things You Will Need:
Measuring Tape: To get an idea about the height you’re going for and measuring the line to level the shelf with.
Pencil: For drawing lines, marking necessary locations and spots for drilling later.
Stud finder: In order to make a stable attachment to the wall, putting the screws into the studs is necessary. As studs can’t be seen through walls, stud finder will help you detect their placements.
Drill bit: Will be needed to drill holes through the wall.
Anchors and Screws: Screws are what will fix the support’s placement onto the wall once and for all. However, it can’t be done without using anchors; anchors keep the screw stable in its place. Find a durable set of anchors and fitting screws to use in the process.
Screwdriver: It will be required for tightening the screws.
Support: The very essential element of the whole piece. Support is what will hold the shelf on its place and help it carry all the weight simultaneously.
Saw: For cutting, shaping and trimming the piece that you want to turn into a shelf. However, different types of the saw are available for different purposes, where hand saw works fine for chopping, you will have to depend on tools like door trimming saw or a circular saw for a good finishing.
Material to Make the Shelf
Your closet, your choice. You should use the material that you prefer the most. However, we can’t forget about its durability and load carrying capacity either, and the material should be chosen wisely as well because of that.
Wood, MDF and plywood are the most popular options out there for shelf construction. Each of these materials functions in a unique way to serve for the purpose. Learn properly about their benefits and drawbacks to make the best investment.
Take Measurements
We already disclosed earlier how sensitive measurement can be in construction. For a little mistake, the materials, your money and time can go to complete waste; one slight miscalculation can lead to an ugly-looking closet.
The measurement is also required for adjustment convenience later on. When you mark the height and position you’re going for; it’s become easier to set the stuff up.
Take the measuring tape and measure the height you’re going for; mark it. Also draw a line leveling to the desired height, which will come handy while you’ll try to line up the shelf. Spotting the studs is also mandatory, so detect and mark them too.
Once you’re done marking and measuring, it’s time to get down to main business.

Start the Process
1. Mount the Support
The studs have been already located using stud finder; now, take the support and position it into a stud’s placement point to mark the holes where the screws will go.
Remember, the supports can’t be at the distance of more than 36 inches if you don’t want the shelf to bend or break apart with time.
After marking the hole, take the drill bit and poke holes into a stud. Use anchor and screw to mount the support, with the help of a screwdriver. Repeat the process for all the supports.
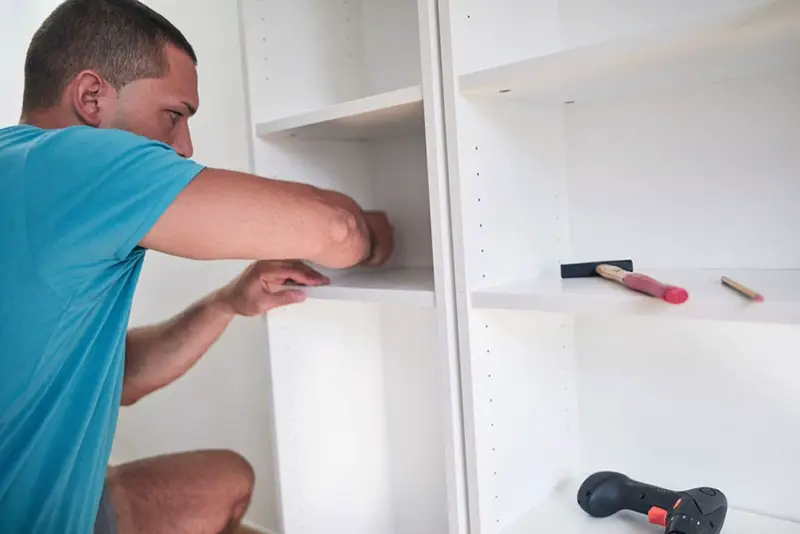
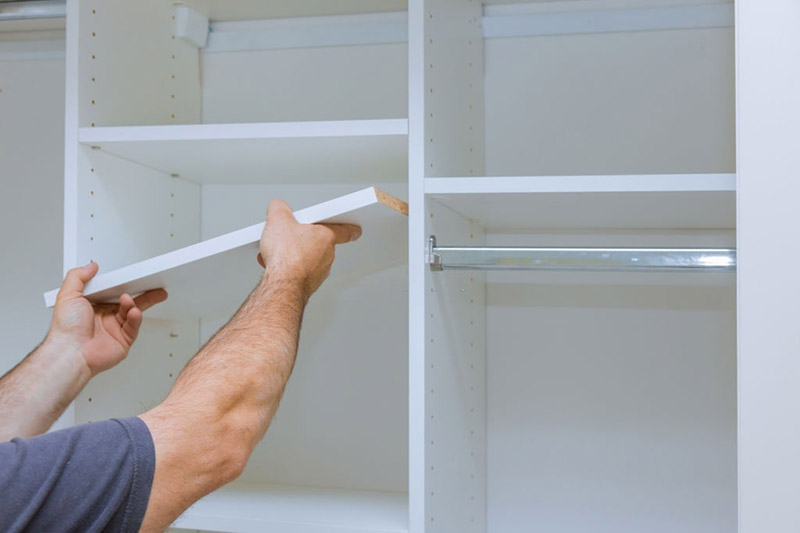
2. Place the Shelf
This one is super easy. The selection and shaping of the shelf have to be completed by now already. Take the shelf and carefully place it over the support, trim a little bit if you’re having a problem fitting it.
3. Fix the Shelf
This step is totally up to your preference. You can use adhesive glue or tapes to make the attachment on the wall permanent.
You are Done!
Once you’ve placed and attached the shelf, your job here is done. See how easy attaching closet shelves to the wall!
This is Autem Decker. Main Author of ‘TheHomeDigs‘. You may not find her on the list of top 10 contemporary Canadian interior designers, but everyone who knows her says she was born to be an interior designer.
She makes her plan in her head and draws them in her years-old diary with a note in the corner. The way she plays with color and shape amazes us.
Connect Her On – Twitter