Installing floorings all around the house is very different from installing floorings in your bathroom. Because unlike the rest of your house, the bathroom is almost always wet or at least gets wet now and then.
That’s why you need flooring which has planks that are not only durable and sturdy but also provide complete water protection to the subfloor underneath. Vinyl planks are a great choice for this kind of flooring.
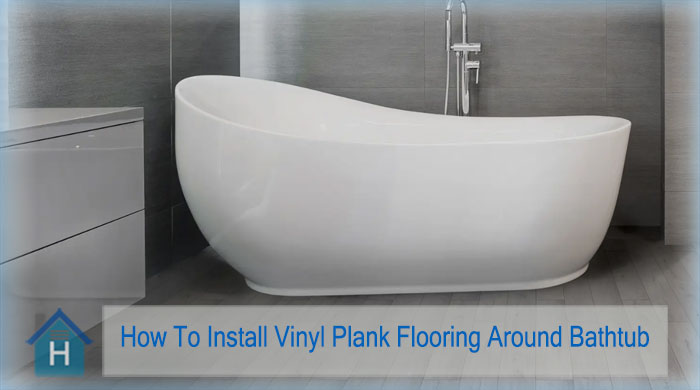
It is easy to install vinyl plank floorings in a bathroom which doesn’t have a bathtub. But if the bathroom does have a bathtub, you will need to be a little more delicate while installing vinyl planks. You need some caulks to seal water outside, and these caulks have to go along all four sides of the tub.
Let’s take a look at how to install vinyl plank flooring around a bathtub and give your bathroom a unique look.
What is vinyl plank flooring?
Vinyl flooring is entirely made of synthetic materials. They usually have four layers, a top layer made of aluminum oxide, a protective layer to prevent wear and tear, a design layer that mimics the design of any material you want, and finally, a backing layer, which is made of vinyl that is quite rigid.
Installing vinyl plank flooring around your bathtub
Since the vinyl plank floorings are made of synthetic materials entirely, they are not susceptible to damage from water and moisture, which makes them a perfect choice for installation in your bathroom.
Another thing that these floorings have going for them is despite being thinner than most floorings, they don’t buckle under the pressure of water. They also can mimic every kind of surface, such as wood, stone, tiles, ceramic, etc. As a result, not only will your bathroom have a durable floor, but a classy looking one as well.
Now, installing vinyl planks as the floorings around your bathtub require a few steps to be followed. These are :
1. Removing the current flooring
If you are willing to install vinyl flooring, I guess you don’t have them installed already. In that case, remove whatever flooring you currently have in your bathroom. You can also take out your trim if you want to replace them, but this one isn’t a necessity. You will need a pry bar and a demo bar to remove all the floorings in your bathroom as well as its underlayment.
You may take the flooring off quickly in all other parts of the bathroom except the toilet flange and the bathtub. It’s best that you take your time and remove the floorings carefully as hurrying up may damage the flange and the tub. Once the flooring is removed, vacuum all the debris.
2. Preparing the subfloor
Now you need to prepare the subfloor to properly lay the planks afterward. First, take a scraper and take off all the mastic from the subfloor. Then use a belt sander to complete scraping the floor, and vacuum it again.
Next, check the floor if it was completely level, as sometimes the seams don’t go down and create a hump on the floor. Take the belt sander again, and try to level these humped-up seams as much as you can.
Next, and this is very important, check for any nails which have been sticking out. Nailing these down to the floor is very important as they can damage the newly installed vinyl planks.
3. Adding underlayment
Now that the subfloor is prepped, you can go about adding the underlayment to it. Before adding underlayment, check whether your toilet flange is too high compared to your floor. If so, call in a plumber to lower it.
Now, remember the caulk I was talking about? It’s now time to add it to the sides of the bathtub. This will keep the water out of the subfloor. Silicone caulks are the best in this regard.
Next, add 5mm thick plywood planks over the subfloor to give yourself a surface that is quite smooth. Then secure these planks to the floor with staples. Make sure that the staples are down.
4. Installing the first row of planks
After planning your layout perfectly (which means keeping the small pieces to a minimum), start installing the first row of the vinyl planks. It is a bit difficult as not all walls are 100% straight. In that case, find out which part of the wall is not straight and cut out the piece of plank which isn’t gonna fit with it. Then drill holes on the planks for water supply and fit them over the pipes.
5. Installing the rest of the flooring
Installing the first row is the trickiest part of installing vinyl planks in the bathtub. First cut a plank in a way that notches the toilet flange perfectly. Then start installing the planks one after another. After putting the second row in place, tap the first row of planks to lock them into place. Then tap the next row of planks and lock them with the first one. Keep repeating the same process over and over until you have laid down the tiles entirely.
6. Installing the transition piece and silicone
When you reach the doorway, you may not be able to fit whole pieces of vinyl planks in place. In that case, you install c-channels and t-mold to snap the c-channel in its place. If your door trim isn’t flush with the wall, then prepare a step cut on the planks that will go around it. Then install the transition piece in front of the door.
Next, fit the planks around the tub with silicone caulk and you are done installing your flooring.
Final words
Nowadays, installing only regular flooring in your bathroom doesn’t cut it. People want their flooring to be durable and look classy at the same time. This is even more true for the areas around the bathtub.
So if you know how to put vinyl flooring around a bathtub, you can provide your bathroom floor with not only protection from water, but also give it a unique and classy look.
This is Autem Decker. Main Author of ‘TheHomeDigs‘. You may not find her on the list of top 10 contemporary Canadian interior designers, but everyone who knows her says she was born to be an interior designer.
She makes her plan in her head and draws them in her years-old diary with a note in the corner. The way she plays with color and shape amazes us.
Connect Her On – Twitter