So, you have finally come up with the idea of giving that hardwood floor of yours a nice and refreshing look with some restoration steps. Now if the floor is not badly damaged, then you can even skip sanding and still manage to revive its outlook.
By this, it means that the floor must be free from any deep dents or even scratches. Something that allows one to only get rid of one to two millimeters from the wood surface. If that’s the case, then you are pretty much good to go.
All you need is some time and patience to learn deeply about how to restore hardwood floors without sanding. Let’s help you with that today in this guide.
Let’s Know How to Restore Hardwood Floors Without Sanding
The most effective way would be to refinish hardwood floors without sanding. Getting a good quality hardwood floor restorer will help you revive all the mini wear and tear. There are specifically meant for hardwood floor finishes available.
And you should consider getting one of those as it would be more targeted in the purpose we are trying to achieve. You can begin whenever you’re ready, the process starts from below…
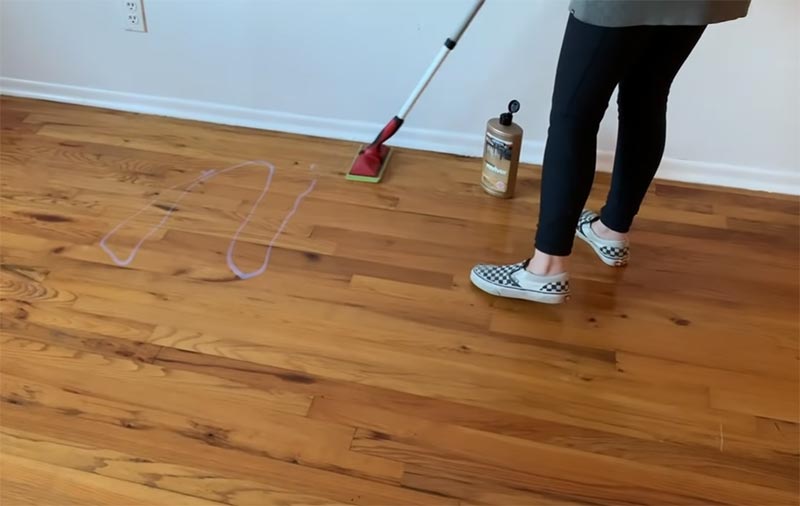
Start By Cleaning the Surface Well
To clean the area, some people prefer using a pH-neutral floor cleaner. While warm water also does a great job alone. So personally, I would recommend you to simply move ahead with warm water. Unless you have some really dirty flooring that definitely needs something stronger than plain water.
With warm water, you just need to get down on your knees with a piece of cloth or rag. Then damp it with warm water. And use your strength to nicely scrub the whole surface that needs restoration. Of course, you don’t want to drench the whole floor. Instead, try to keep it minimal. Or else there could be issues such as water damages. And we don’t want that.
Identifying The Existing Finish of Floor
If there’s already some sort of finished applied to your hardwood flooring, you need to know about it before getting a new one.
Now you should already know if the flooring is covered with a lacquered or oil-based finish. However, if you don’t, things can be difficult. Because for a non-professional, it’s quite tricky to identify the finish type. Here’re a few pointers that might help.
It’s an Oiled or Hard wax Oiled Finished Flooring If:
- The surface seems to wear faster than usual.
- It has a sort of orange tone or something that’s more on the darker side.
- It’s super easy to stain and catches marks from drink spills.
It’s a Lacquered Flooring If:
- The tone is lighter comparatively.
- It doesn’t wear too soon.
- Has a shiny outlook.
Once you figure out the finish type, you can get the similar one for the restoration process basically. For the oil-based finish flooring, you want to try something like hardwax oil. And if it’s a lacquer-based flooring, go for something that isn’t acrylic or part acrylic and polyurethane lacquer.
You’ll Need to Gently Buff the Surface
Now since we are not using a sander for the floor, we’ll try an alternative that’s gentler. And it’s called buffing or more especially we’ll try the screen and recoat method for restoration.
With sanding, you take off the sealer and damaged wood parts. But buffing instead will help in only contacting with the polyurethane finish sealer and it never touches the wood.
Once the floor is dry, use a buffer with 12—grit screen all over it. Anything coarse than that isn’t necessary. We just want to even things out and nothing else.
You can also use your hand to buff with 120 papers. Make sure to follow the wood grains though. Don’t leave any area unabraded. Avoid applying too much pressure as well. This step would help the coat to bond better.
At this point, you also want to use wood filler for large hole or scratches if any. However, you should rethink skipping the sanding step with huge gaps, grooves, gouges, or holes. It’s almost necessary. As soon as you are done with screening, get rid of the dust and tack floor.
Applying The Hardwood Floor Refinishing Products
You need to directly apply the stain after screening on the hardwood floor. Then go for a clear finish coat on top of it. go for a waterborne finish if you want to get things done earlier, it dries faster.
The dust that gets raised with the operation won’t be as bad as when you include sanding. While applying the lacquer-based finish, use a medium pile roller. This will give great coverage.
While for oiling, the short pile roller works best. Check the refinishing products label to know the duration for drying and follow exactly. And that’s pretty much all you need to do.
Hardwood Floor Refinishing Kit – The Best Route?
Getting material and supplies separately can be a hassle for some people. To make things less time-consuming, you can think about a hardwood floor refinishing kit. These already include a clear finish, tools that are necessary, and also the chemical etcher.
If you don’t already know, the last one is basically a re-glossing product for existing finish. And it’s amazing to revive and restore hardwood floors. So, this could be the best route for those who don’t have much time on hand to spend on the restoration project.
Overall Thoughts
And that’s how to restore hardwood floors without sanding step. It’s great that you thought about reviving the flooring even when it’s not badly damaged. Most people don’t even care about the flooring until there are obvious and scary signs of wear and tear. It’s always best to keep things maintained and never reach the point where it requires repair.
Anyways See You on Some Similar Topic Soon, Take Care.
This is Autem Decker. Main Author of ‘TheHomeDigs‘. You may not find her on the list of top 10 contemporary Canadian interior designers, but everyone who knows her says she was born to be an interior designer.
She makes her plan in her head and draws them in her years-old diary with a note in the corner. The way she plays with color and shape amazes us.
Connect Her On – Twitter