
When you tell someone that the whole bathroom light installation chore is fun, they’ll probably look at you with confusion. But they don’t know you are talking about the after results, that mesmerizing outcome of beautiful lights taking over your gorgeous bathroom vanity.
Getting the light fixture installed can be however a daunting task, not going to argue on that fact. But that’s the beauty of the whole project. Sweating for treating yourself with a satisfying result. Looks like you are motivated enough.
Now shall we proceed with learning how to install bathroom vanity light?
The Whole Process Of Bathroom Vanity Light Installation
Getting your hands on the right tools is the first thing to ensure. And of course, you want to switch the circuit breaker off before trying to remove the old one. Learning how to install a new bathroom vanity light will be incomplete without having a proper idea about tools and safety requirements. Keep on Reading…
Some Preparation You Must Do
The new vanity light needs information of your bathroom mirror’s width. Try to focus on the existing light first. Is there anything you would like to change about its positioning? Suppose you have two bulb fixtures. But the illumination is not enough for your mirror’s center area. And that means you should route for a 3 or 4 bulb option for the new setup.
Some vanity lights stay on either side of mirror. And in such a case, you want to take measurements of the fixture base. Also, you want to consider measuring the space that is available between wall and mirror edge. Instead of a wall, it can be any nearby obstruction such as a cabinet. When getting the new light, make sure it seats in place without being in contact with a mirror or side obstruction.
After receiving the vanity light package, go through the provided instruction as well. You want to perform any assembly that could be required for the vanity light beforehand of installation. You should also check the back of the fixture. Make sure the wire protruding is enough for fixing with house wiring. Being prepared with the fixture and wiring process, you’ll save a lot of light and effort for later.
Detach Glass Shades & Light Bulbs
Before the new bathroom vanity light fixture installation, you want to remove the old one. Start with the vanity light’s glass shades. Get it out. There should be tiny thumbscrews that hold the shades in place. You need to loosen them for releasing the shade. Then move not the light bulbs.
Remove them carefully and place them in a safe location. the old fixture should be connected with the wall through nuts or screws. Use an appropriate tool for loosening them. And then keep the nuts or screws aside.
Getting The Old Light Fixture Out
Apply gentle force to pull the old fixture away from the wall. You will notice the wiring beneath is exposing too. You will need a noncontact voltage tester here. Make sure there’s no power cursing in the wires through it. Do this for both in-wall and fixture wirings.
Next, you need to disconnect the housing wire. Gently pull them out from the housing. And then you want to detach the wire nuts. Take them out and this will allow you to separate the old fixture wiring from in-wall ones. There are two sets of wiring, black and white. You need to do this for both sets. There can be bare ground wire too. You want to remove it as well.
Now bring the whole vanity light assembly out from wall. Keep it aside somewhere safe. Some wires should be sticking out from the wall. You want to give them a check too. Make sure the condition is still good enough.
If not, then you need to strip half-inch of the coating from each end off. You need to trim them too. Use wire strippers. When you’ll hook up a new fixture, this will ensure a proper connection.
Attaching New Mounting Bracket
The new light’s material should include a mounting plate. This piece can be called a plate or even a bracket. Some manufacturer refers it as a bar too. The design of this piece usually ensures proper connection to electrical housing on the wall. You definitely want to get rid of the old one that might be sticking to your wall.
Usually, people would want to know how to install 3 light vanity bar as that’s the common variety. But depending on which model you buy, things can change. Installation instruction is that’s why very important to read before starting anything.
Attach the new mounting bracket and follow instructions that manufacturer has given on it. This information depends on the variety of brackets you have received. You should also receive screws or nuts for fixing it. And usually, this is a pretty straightforward step to get done with.
Work On Necessary Wiring
There should be a grounding screw on the new bracket. You want to attach the are grounding wire with it. Use the partially loose screw for attaching. Simply twist it a few times until it is tight enough. Usually, the head of his screw is green in color. If there’s no tint to identify the screw, look for this information inside included manual.
The new light should have a black color wire. You want to twist this with the wall’s black wire. Then turn the wire nut clockwise until it tightens properly. The wire should be secure inside nut, you should tug it with gentle pressure.
With the white wirings, you want to do same thing. Make sure the nut is tightening well here too. Then you want to put the fixture on the wall where you’d like it to the position. And make sure the wiring is fully inside electrical box.
Finishing Touches
The base plate will attach to vanity light mounting bracket that is attached to electrical box. You simply need to tighten the screws or nuts to make that happen. To add some extra support, you can include wall anchors too. This will allow proper stability to your vanity light.
Usually, the kit comes with wall anchors if it needs extra support. There should also be screws and instructions on hole placement for anchors. You want to follow the provided guideline strictly here.
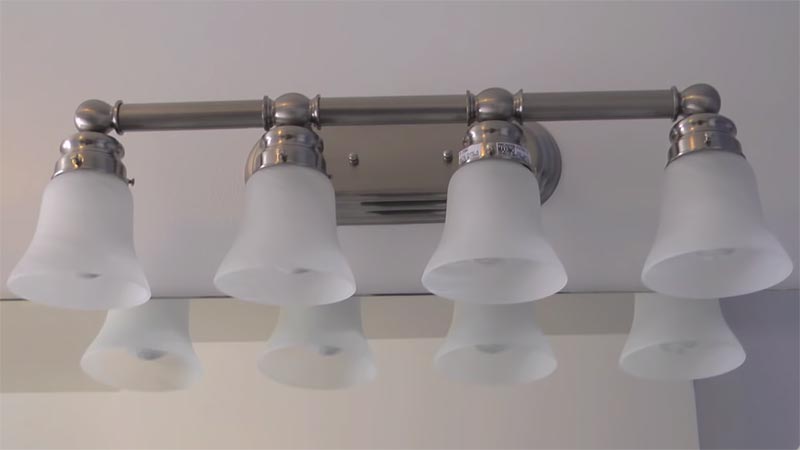
Place the glass light shades over vanity light. Then use the thumbscrews or nuts given along to secure shades in their place. In each socket, you want to insert one light bulb. If saving energy cost is your motive, go for the LED bulbs here. Also, when using incandescent bulbs, you want to check the near socket’s wattage. Find the highest indicated wattage and make sure bulb has lower than that.
Turn the bathroom circuit breaker on. And you can then turn on the switch for light to power new vanity illumination setup.
You May Love to Read These Posts:
# How to Install Bathroom Vanity Plumbing
# How to Install a Bathroom Vanity Top
# How to Vent a Bathroom Fan Through the Roof
# Best Bathroom Exhaust Fans with Light & Heater
# How To Remove A Bathroom Vanity
Wrap Up
That’s all you need to know on how to install a bathroom vanity light. It isn’t actually a very hard project to complete if home improvement tasks are familiar to you. Those who are into such repair and fixing chores will find it very simple to attempt.
Just make sure you take proper safety precautions if you’re a beginner, however. Also, if the thing seems intimidating to complete all by yourself, don’t hesitate to call an expert for help.
This is Autem Decker. Main Author of ‘TheHomeDigs‘. You may not find her on the list of top 10 contemporary Canadian interior designers, but everyone who knows her says she was born to be an interior designer.
She makes her plan in her head and draws them in her years-old diary with a note in the corner. The way she plays with color and shape amazes us.
Connect Her On – Twitter