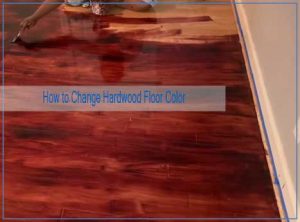
Upgrading the look of your home or office often includes the floor as well. One cool way to make that change is simply altering the color of hardwood floor.
And yes, you can very well do that! What you’ll need are some supplies and your will to learn and research properly on how to change hardwood floor color.
It’s really simple for the most part, just needs some careful considerations here and there. So, shall we dive into the actual process of making that happen?
Change the Hardwood Floor Color Through Some Steps
I’ve divided the whole process into four stages. So that it’s easier for you to plan and prepare things better. Keep on Reading…
Start By Observing Your Hardwood Floors Current Color to Decide the New Shade.
The first stage to change stain color on hardwood floor involves considering the current shade first. Not every color out there will suit all hardwood species equally. Suppose you have the dark engineered wood flooring. It’s best to not think about making it lighter in that case. However, if it’s a lighter wood, then your color palette can be broad and beautiful.
Keep These Notes in Mind for Deciding New Color:
- If the space is small and your flooring is made of pine, maple, or oak, go for light colors. It’ll make the room look bigger and also these species are easy to clean so there will be fewer issues of spots being visible. Off whites and beiges are the perfect picks.
- For areas that have direct sunlight, dark shades will be great as they are more capable of absorbing the sunlight. There’s less sun damage to the flooring. Satin finishes are great to keep scratches and dirt less appearing. Also, dark colors are known to have an elegance factor. So if that’s your vibe, go ahead.
- Use color samples at home and try matching them with your furniture to decide which shade will fit into the area.
Get The Floor Ready for The Color Shift
Next, you want to properly clean the space before applying any sort of hardwood floor stains. Absolutely no furniture or rugs should be present in that room to avoid wet stain causing them damage. If possible, get the doors out as well, simply off their hinges would do.
You also need to get the molding off from the wall bottom so that sanding is easier to do. If there’re any staples below the carpet, get rid of those as well. The same goes for any existing nails.
Over the doorways, vents, windows, and registers, get some plastic sheets and place them there. It’ll help to eliminate works necessary for dealing with dust from the sanding. Some often look for ways on how to change the color of hardwood floors without sanding, because of the extra mess usually. However, it can be easily sorted by placing some sheets, and that way the benefits from sanding won’t be sidestepped.
You can use a random orbital sander as it leaves no scratches on floors. To get the most fabulous sanding results, try three types of grit one by one. Coarse, then the medium one, and finally a fine grit.
While sanding makes sure you are not going over one spot for too long. Sand the center as well as edges and corners of the room properly. You can get a detail sander for the corners.
Once you are done, get a vacuum with a brush attachment to clean the spot. You can also use a broom. After the third sanding session, mop the entire floor and buff nicely.
Next Read: Some Popular Types Of Floor Sanders
Painting & Finishing the Floor
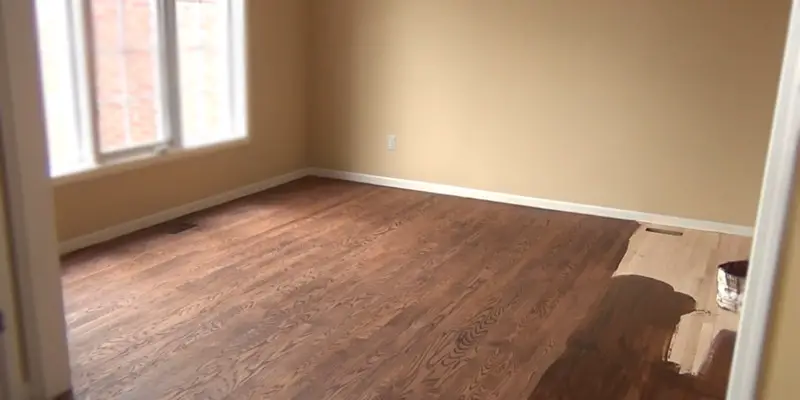
With a roller or brush, you need to go for a thin first coat of paint on your hardwood floor. Make sure you are carefully following the grain of material. That would give the best application.
Go through each and every section taking your time. After you have applied the paint, wait for one to two days. This will allow the paint to settle perfectly. You can sand the floor lightly and go for a second coating to make it even prominent. Some even go for three coats of paint.
Finally, apply a coat of hardwood floor polyurethane finish and that will help you preserve the flooring’s strength as well as integrity. You simply need it to mix the polyurethane finish properly and then apply it using right tool.
For the edge of floors, it’s best to work with a bristle brush. And then for center floor application, you’ll need a dedicated applicator. Make sure there’s enough ventilation going on. The polyurethane has a pretty strong smell that can cause you issues otherwise.
Once the refinished flooring looks completely dried, you want to get back the doors, molding, and furniture to their designated place.
Going Light with Your Hardwood – The Extent!
There are some people who mean going light to change hardwood floor color. And there’s an extent to that depending on what hardwood type you’re talking about. If you want to go for completely bleaching or white-wash finishing, then you probably know how it would look.
But in a natural way, the lightest you can achieve is actual shade of that hardwood type. There will be no stain obviously. And this clearly varies from type to type.
The white oak is naturally a bit darker than the red oak. Also with maple, you’ll witness a very light tone. While for pine, the tone is a bit dark. It keeps changing based on the type of wood you’re talking about.
Wrap Up
Now you know how to change hardwood floor color through painting and refinishing. Going a bit lighter or adding darkness to the floor may not seem like a huge change, but it definitely is when you consider the whole space together. It’s a whole new vibe basically. So, if you are thinking about that change to spice up your place with such little alteration, go ahead.
This is Autem Decker. Main Author of ‘TheHomeDigs‘. You may not find her on the list of top 10 contemporary Canadian interior designers, but everyone who knows her says she was born to be an interior designer.
She makes her plan in her head and draws them in her years-old diary with a note in the corner. The way she plays with color and shape amazes us.
Connect Her On – Twitter