 A bathroom vanity is not just a thing you add for fun but something that has a great purpose. Getting ready and dressing becomes so much easier plus convenient to do right after a shower. So, when you have decided to install one inside your bathroom, you’ve definitely done a good deed towards your future self.
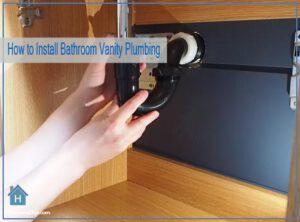
Now during the installation phase, one thing that some homeowners find confusing to carry out is how to install bathroom vanity plumbing. Some don’t bother and get a person hired for doing the chore. But if you wish to save that money and try things for yourself, today’s piece of writing should be helpful. Keep on Reading.
Start with Installing Bathroom Vanity Plumbing
The whole vanity and bathroom sink plumbing installation process is not something you can learn just by getting into it. From very first step of disconnecting the sink to plumbing after vanity installation, everything needs detailed discussion. Let’s do that in this segment.
Sink & Water Line Disconnection
The start to plumbing for bathroom vanity sinks will require you to disconnect sink. Turn the water valves off and release the existing faucet pressure. The P-trap, a curved section should be getting a drainpipe right beneath sink. You want to place a bucket or towel below it. So that any spilling water from the trap gets into it. Get the trap off from drainpipe by loosening top located nut. Get it out completely.
The valves should be disconnected from water lines too. The sink backsplash connecting with wall also needs to go off. Use a utility knife to cut the connecting sealant or caulk.
Vanity Removal & Marking for New One
Get the screws out from wall that holds vanity in place. Carefully get the old bathroom vanity out too. There can be damage on walls that you should repair or repaint at this point. A putty knife or a simple brush for painting can help with any touch-up required.
Now the position of your new vanity needs some marking on wall. You want to carefully mark the width and height. Make sure to mark the studs that are within vanity outside. A stud finder can help you here. You may need to measure the pipe positions on wall too. Especially when the new vanity has a solid back. Simply transfer all the vanity back measurements on wall. Use the proper measurement hole saw for cutting pipe holes.
New Vanity & Top Installation
You want to slide the cabinet of vanity in position while making sure it’s lining with earlier marks. Get the doors of vanity out for easy installation. Check level and if there’s a need then adjust the height using shims.
Then drill the pilot holes on closest studs. Use some screws to attach here. Use wall anchors if there are no studs, of course, the correct ones.
Some vanity comes with no attached counter. In that case, you want to fix the top of vanity with cabinet using a thin bead of caulk. Reinstall the doors of vanity at this point. The space between backsplash and wall, you want to put caulk bead here. Do this along the edge of backsplash, where it is supposed to meet wall.
Between the wall and vanity, you need to push caulk in this gap. Use a caulk finishing tool to do this. Or you can also use a nitrile gloved finger for this. Make sure to dip the finger in water first. There are the ones made with rubber too.
Faucet Installation & Plumbing
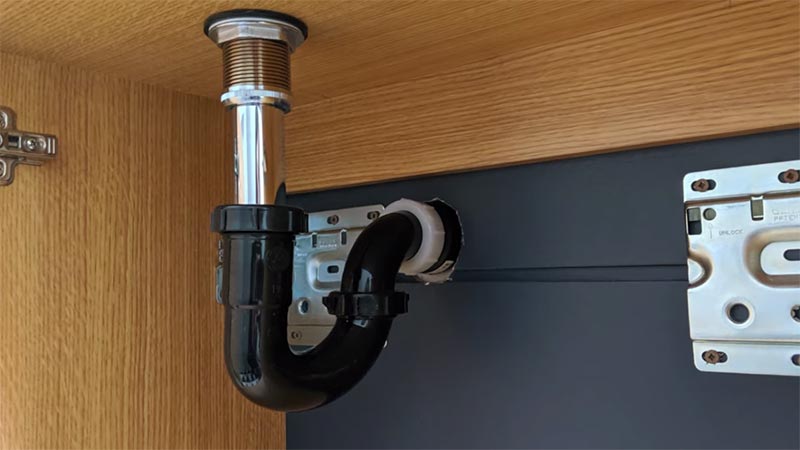
At this point, you will be installing a bathroom sink drain. Learning proper way on how to plumb a bathroom vanity sink drain is the key here. But before that, you need to also get the faucet inside.
Precisely follow the manufacturer-provided guidelines to do this. Also, consider sink compatibility as well as valve type for buying the faucet. It should fit with proper style and finish.
Right below the sink drain ring, you want to apply a plumber’s putty rope. Now with the new bathroom sink drain assembly line carefully connect P-trap. Following a clockwise direction, apply the plumbers’ tape. Do this before connecting any water valve lines at all. Tightly attach the faucet connection.
What You Need to Know About Bathroom Vanity Plumbing Through Floor
In a typical scenario, the waterline usually emerges from the wall. But sometimes due to it remodeling needs, you may need the process of plumbing the vanity through the floor. And that’s exactly what this segment is about.
Vanity waterlines typically emerge from the wall. This is due, in part, to the locations of waterlines inside walls. Wall locations are convenient because waterlines can be tapped from both sides of the wall, meaning that vanity cabinets or toilets can then be placed back-to-back on opposite sides of wall in different rooms.
Vanity Installation
When the vanity cabinet comes without a bottom shelf that’s the right time to install water lines and vanity. A very unlikely to happen scenario. With the typical one, you have a bottom shelf with a vanity. And so, you’ll need to drill it before installing waterlines.
Use a 1-1/4-inch spade bit and driver or drill to simply make a hole through the bottom shelf. Take necessary measurements for making these holes. For each valve that is emerging from the floor, you need one hole.
Hold the vanity and put it over your made holes. Let the valves sit right through holes. Then normally continue the installation by using screws through the base. Start with top installation and end with faucets.
Bathroom Sink Plumbing Through Floor
Your existing waterlines in the floor need to tap into vanity and bathroom sink. For that, there should be a valve attached to the pipes. This basically caps the pipe and helps to turn off vanity whenever there’s a need. The sink that is fixed on vanity will have waterlines from valves of floor. You simply turn the water on with these installed valves to access.
About Water Supply Lines Through Floor
Locating the floor emerging waterlines are not a tough thing to do. They need to raise for at least 4 inches. Go more if possible. This is because the turn bottom shelf stays at least 3 inches top from floor. And so, water valve penetrating from floor upwards and going through vanity’s bottom shelf is what the scene should be like.
You also want to decide on the hot and cold-water valves. Blue marking means cold water line. While the red one refers to the hot line. On both floor emerging valves, you should be able to locate threaded fittings.
Use thread seal tape and go for at least three wraps for all threads. There should be half-inch fitting on both lines’ end portion. You should find tiny bushing inside made of nylon here.
If not then get new bushings and insert them, screw one end to the floor valve and another end to faucet end. Use your fingers to tighten them first and then go with a half-inch wrench to further tightening. And that should do.
Wrap Up
And that was basically all about how to install bathroom vanity plumbing. Both methods of the wall and floor connection works for different settings. You chose depending on your bathroom scenario.
Make sure to get rid of all doors and drawers out before installation. Also pay extra attention when buying the new vanity, especially the measurements. Sometimes while removing old vanity the clips disagree to come off.
And that’s when people try to break them off. You should be very careful if such a need shows up. Don’t end up breaking your sink. And on that note, let’s end for today, see you soon in some other find topic.
This is Autem Decker. Main Author of ‘TheHomeDigs‘. You may not find her on the list of top 10 contemporary Canadian interior designers, but everyone who knows her says she was born to be an interior designer.
She makes her plan in her head and draws them in her years-old diary with a note in the corner. The way she plays with color and shape amazes us.
Connect Her On – Twitter