
Some people will give up on the idea of sanding and refinishing their hardwood floors believing it’s something only professionals can make look perfect.
But that’s not the entire truth. Sanding floors DIY isn’t hard to pull off.
Actually, if you pay close attention to details and agree to spend more time without trying to end things too quickly, your efforts can also turn quite as good as experts.
And basically, that’s what I’m about to help you with through this guide on how to sand and refinish hardwood floors yourself. Are you ready to find things out?
Preparation Phase Before Sanding and Refinishing Hardwood Floors
A few tips that you must take into considerations before actually moving on with the process will be provided right below.
You must pay attention to getting ready the sander before the actual process. It should be fixed with sandpaper that has coarser grit.
You want to also figure out a position that would allow the sander to go with the wood grain direction when sanding. Usually, for the warped floor, it’s best to work diagonally with grain. However, you must always ensure not to go wholly against the grain of wood.
If you are planning with sanding hardwood floors by hand then the process isn’t very different from using sanding machines. The only variation would be the use of elbow grease. When working with hand, you want to be a lot more generous with elbow grease application.
Also, at the beginning work with a low grit and slowly make your way up. Maybe go with a 40 grit first to then move to 60, next 80, and finally with a 100-grit version. The gear-driven setting of a random orbital sander that’s handheld will also do wonders.
Finally, never skip a proper face mask and protective goggles for such projects. The amount of dust flying around is a lot to risk your eyes and lungs as well.

Next Read: Types of Floor Sanders and Their Uses
Here’s How to Sand and Refinish Hardwood Floors Yourself
Finally, we are ready to enter the much-needed segment. Keep on reading…
Sand Hardwood Floors Step-by-Step:
- Turn your sanding machine on and start moving it at a steady pace. You don’t want to work on one spot for too long. Follow the grain of the wood and keep on moving it, never try to push.
- Once you reach the room’s other side, transfer over. And you want to tad bit pull back. So that the next few inches are passed through the overlapping. And that’s around the width of one floorboard. Make sure you are not turning the machine around.
- Take breaks for checking the sandpaper. If it is worn out, you should change it with another same grit sandpaper. Also, make sure you dump the collected dust from time to time.
- Go through the entire floor and make sure to be within walls and corners from a few inches. After one completed trip, stop moving and turn the device off.
- Use similar grit sandpaper this time in a hand sander to go through the room’s edges. You want to use a semicircular movement and make sure the completed spots are overlapped.
- Before jumping to the second sanding session. Use your vacuum cleaner and clean the spot. You can repeat all the beforehand steps once or twice simply changing the sandpaper grit. The best technique is moving with 50-60 grit for the second session and then stepping in with 80-100 grit for the final or third one.
- Once you are done, buff the surface if there’s a rough feel or lines on it visible from using a sander. You can next use some mineral spirits in a cotton rag to wipe the space after mopping it once with water. Dry it completely and move onto the stain application if you’re planning to change the color. Otherwise, you can move directly to the finishing step.
Refinish Wood Floors Step-By-Step:
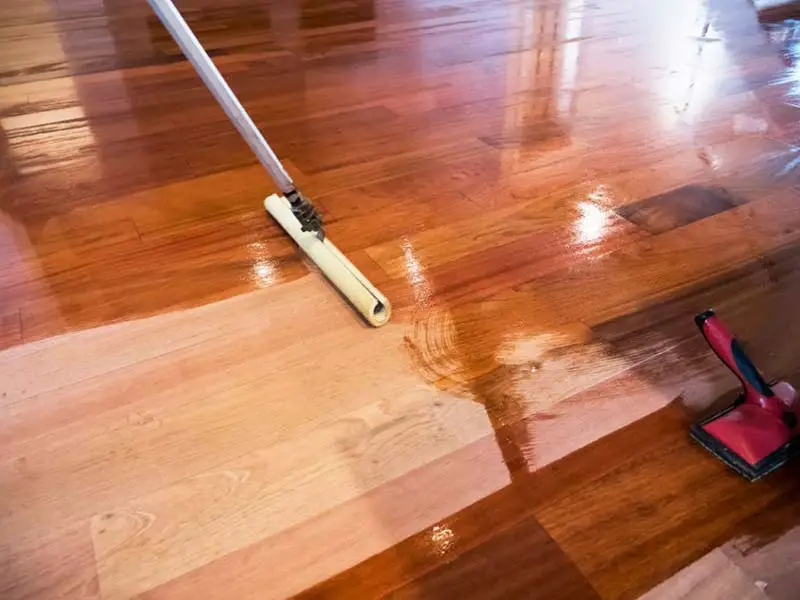
- To apply a polyurethane finish on top of your flooring, you’ll need to start from the room’s perimeter with the applicator. Go for covering around 12 inches of floor starting from the wall. And it should go towards the room center. Of course, work with the wood grain direction.
- Sidestep any drips or bubbles and keep the brush wet. After the permitter is completely applied. Get a lamb’s wood applicator. And use it for the remaining surface. Apply and move towards the room’s exit area. Make sure you don’t allow anyone to step on top of the floor after applying the polyurethane coat. For overly trafficked areas, go for a second coat.
- Let it dry for at least one day and night. You want to wait for this much in between coats as well. Also, based on the humidity and temperature, you may need to wait for longer than that.
How Long Does It Take to Refinish Hardwood Floors?
If you are using an oil-based finish and applying 2-3 coats then the thing would take 3-5 days typically including the drying time. On the other hand, water-based polyurethane takes less time to work with. It takes somewhere between 1-2 days.
However, the climate condition, especially inside the room, temperature and humidity, would lessen or increase the required amount of time for refinishing a hardwood floor.
The condition of your flooring is also a very critical factor here. Suppose it’s about refinishing 100 year old wood floors. Of course, that would have lots of scratches and worn-out areas. Not to mention water damages. You might also need to use wood filler for fixing certain errors. Not just would it take a long time, but also refinishing old hardwood floors require intensive labor.
Overall Thoughts
And here we are! Done with the whole thing discussed. Now you know how to sand and refinish hardwood floors yourself and maybe quite ready already to start the project of making your space a lot better.
These floorings are really typical at losing their actual luster over time. And so, the warm feel hardwood provides soon becomes absent that sanding and refinishing may retrieve.
However, if things seem to be a bit too tricky, then why don’t you consider hiring a professional? Yes, it will require some additional spending, but if your hardwood flooring is pretty old, then isn’t that better than having to replace the whole floor later on? Think About It.
This is Autem Decker. Main Author of ‘TheHomeDigs‘. You may not find her on the list of top 10 contemporary Canadian interior designers, but everyone who knows her says she was born to be an interior designer.
She makes her plan in her head and draws them in her years-old diary with a note in the corner. The way she plays with color and shape amazes us.
Connect Her On – Twitter